Project Information
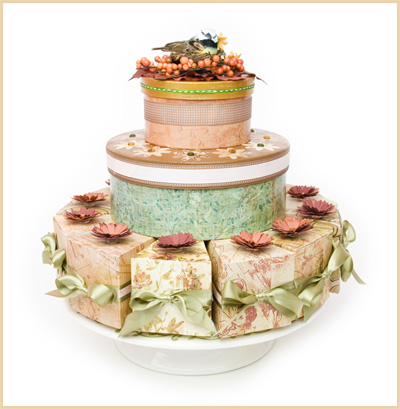
I've made this favor box cake for my mom's birthday party and she and the guests are going to be wild for it! I've seen other folks do the cake boxes on a cake plate with ribbons, so I thought why not add two more layers and some 3D flowers?? I just loooove the way this came out!!
This is perfect for a birthday party and could also work for any other party - especially a baby shower or a wedding shower. Or imagine a spooky Halloween cake, a festive Christmas cake or a Mother's Day cake.. We're going to have to do this again!
Dimensions
Here's the exact shapes, sizes and colors that we used. Clicking on the name (in white) will take you to our store where you can purchase the necessary files!
Note: The SVG dimensions given in the chart show width using the "Keep Proportions" option in the Sure Cuts A Lot properties window. Size each SVG file to the exact dimensions listed.
| Betty's Bags and Boxes SVG Collection | ||
| cake_box.svg | 11.4"w (Keep Proportions) - Cut 12 | Cream colored paper |
| 3D Flowers SVG Kit Part II | ||
| Petals.svg (Bachelor's Button Extras Folder) | 4.8"w (Keep Proportions) - Cut 12-20 | Two different shades of Rusty Red |
| Dawn's Doilies SVG Collection | ||
| daisybot.svg | 1.5"w (Keep Proportions) - Cut 11-12 | Cream colored paper |
Design Tips
- We filled each cake box with various individually-wrapped chocolate candies.
- Use 18-20" ribbon for each cake box. We used a pretty satin sage green ribbon. The glue was showing through, so we covered it over with peach colored adhesive ribbon by Martha Stewart Crafts and this added a nice touch.
- Using a Zot (glue dot), we affixed a 3D flower to each cake box and put some bling (sparkly gemstones) in the middle of each flower.
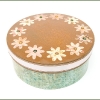
- For the middle layer, we used a 7.5" round paper mache box from Michaels. We painted the bottom green and covered the sides of the box (using decoupage called Mod Podge) with sea green patterened paper. After it dried, we sanded the edges with sandpaper for a nice finished look and then rubbed an ink pad over the white edge.
- We painted the lid brown and covered the edge with two adhesive ribbons by Martha Stewart Crafts. We decoupaged the daisies around the top of the lid and dusted a bit of Fire Opal (copper) glitter on the top before it dried and then added some bling to the middle of each flower. Inside the middle layer, we put a set of 12 lovely thank you cards that we made. I know my mom will just love them and enjoy sending them out to her friends and family.
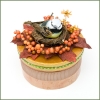
- For the top layer, we painted the bottom and the lid gold and decoupaged some pretty peach paper to the sides of the box. We glued green ribbon around the lid and used more adhesive ribbon around the side of the box.
- Finally, we used our hot glue gun to glue two fall leaves, some berries and a bird in a nest to the top of the box. Inside the top layer, we put some seeds from our garden and some new spools of pretty fall ribbon that my mom will love.
Paper Suggestions
You can certainly go with your own theme and made this project however you'd like. Any coordinating paper will look super! For ours, all the paper we used was from the same pad by Prima (Studio D) called The First Blush Collection. We got this at Michaels this summer, but it was on-sale and they may no longer carry it, but there are other similar pads by K & Company.


5 Responses to “Mary's Corner - Mom's Birthday Cake”