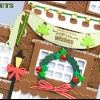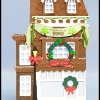
You’ll be sure to wow the recipient of this one-of-a-kind handmade Christmas village card. The details make this one so cute! I had a blast using my Cuttlebug, a stamp and lots of embellishments on this! If you don’t have the same tools on-hand, use my ideas for inspiration and make it all your own.
Dimensions
Here are the sizes, shapes and colors that I used. For all shapes, check "Keep Proportions" in the Shape Properties window and then enter the width given below.
To form the card base (on light blue paper), put the 4.svg shape in the bottom right corner of your on-screen cutting mat. Then copy and paste this shape onto the mat. Select the copy and in the Properties window, click the Flip Horizontal button. Then enter 2.23 in the X field and 4.28 in the Y: field. Select the other shape and enter 6.61 in the X field and 4.28 in the Y field. (Notice that each shape has the same value in the Y field, meaning they are lined up perfectly along the bottom.) With the shape still selected, check the box next to "weld." Then select the other shape and check the box next to "weld." Now they are welded together forming one solid shape which you'll fold in half after cutting to form a card.
| Christmas Cookie Party SVG Collection | ||
| wreath_stars_bottom.svg | 1.73"w | Forest Green |
| Christmas in the Village SVG Collection | ||
| bow.svg | 0.7"w | Red |
| bow.svg | 0.8"w | Red |
| (Deli) 1.svg | 5"w | White |
| (Deli) 2.svg | 5"w | Medium Brown |
| (Deli) 3.svg | 5"w | Dark Brown |
| (Deli) 4.svg | 5"w | Light Blue (Flip copy and weld) |
| streetlamp_top.svg | 0.4"w | Black |
| streetlamp_bottom.svg | 0.4"w | Yellow |
| wreath.svg | 1"w | Forest Green |
| Free SVG 03.24.09 | ||
| banner.svg | 4.3"w | Light Green |
Design Tips
- I embossed the dark brown layer of the building with the argyle Cuttlebug embossing folder. I rubbed a copper colored ink pad on it, which smudged, so I ended up rubbing it heavily on the whole shape. Next time I'll skip the ink!
- To add a snowy touch, before gluing together any of the shapes, I added white/clear glitter to the tops of some of the shapes. To be precise, I used a glue pen specifically for glitter by Martha Stewart Crafts.
- The large wreath and the banner are embellished with holly brads and tree brads by Doodlebug Design. I got these at Hobby Lobby.
- The "Warm Wishes" stamped on the banner is by Studio G, which I got in a little package at Archivers.
- I added some extra ribbon to the banner, which I affixed with adhesive tape, since glue was showing through the satin finish on the ribbon.
- I used 3D Pop Dots underneath the top layer of the building and the two top floor windows.
- To create an envelope to fit, measure your final card and then place a rectangle of the same dimensions on your on-screen cutting mat. Then import an SVG of an envelope (any of our envelopes except for the square envelope will work) and size the envelope to fit using its arrows to re-size and rotate. Make it a big larger than normal to allow for all the extra embellishments.
Paper Suggestions
- I used AC Cardstock for everything. This is my fave solid color cardstock because of its texture, its solid-color core (not white-core) and because of how clean it always cuts for me.


11 Responses to “Mary's Corner - Christmas Village Card”