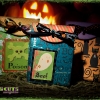
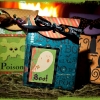
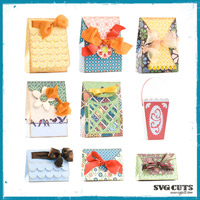
Use our Tied Surprise Bags with your favorite Halloween paper to create quick and easy treat bags! Use coordinating paper for effortless matching and have fun finally using those funky Halloween ribbons you picked up at the craft store.
We only used one SVG Collection to make these bags - the Tied Surprise Gift Bags. Only two pieces make this bag, so it's really all about the paper and cute ribbon.
Tools Used
- Scotch Quick Dry Adhesive
- Double-sided .25" tape by American Crafts
- Titanium Micro-Tip Easy Action Scissors by Fiskars
- ColorBox Paintbox Classic Pigment Inkpad - Black
- Provo Craft Zision Trimming/Scoring Tool
- Sure Cuts A Lot 2 Software
Paper Used
- The Haunting Stack by DCWV, available at Pumpkin Cart Crafts.
Dimensions
Here are the exact SVGs, sizes and papers I used. Size to the dimensions shown below with "Keep Proportions" checked in the Shape Properties window.
| Tied Surprise Gift Boxes SVG Kit | ||
| trellis_box_top.svg* | 11" wide | Solid Color or Tiny Pattern |
| trellis_box.svg | 11" wide | Pattern |
* For trellis_box_top.svg, use only the half circle with two holes in it, not the criss-cross shape. Delete the criss-cross shape in SCAL before cutting by selecting the whole shape and going to Object, and then Break Apart (or press Ctrl+Alt+G on your keyboard). Then with your mouse, click and drag a box around most of the criss-cross shape to select it. Press delete to delete it. You should be left with just the semi-circle shape with two dots in it. Select the semi-circle, and the two dots and go to Object and then Group (or press Ctrl+G) to put the pieces back together.

Mary Rudakas
Design Tips
- The lid looks best in a solid color or a small pattern since it is a small piece. The bag part is much larger in comparison, so that's what you want to use your larger-scale patterned paper for.
- Rubbing a black ink pad around the edges of the box looks fabulously spooky! The messier, the "grungier" and creepier. You'll be able to ink with black for just about any Halloween project.
- Cut your ribbon a little longer than you think it should be. That way you have plenty of ribbon to work with for tying the bow, and then you can always trim the ends later.
- To tie a nice bow, just keep fiddling with it until it looks nice. I wish I had some secret bow-tying revelation to share, but I don't. I just keep messing with it until it looks good. Some ribbons do cooperate better than others. (If anyone has a tip, please feel free to share below!)
- If you're using the DCWV Haunting stack that I used, one of the sheets of paper is various square and rectangular design elements which you can cut apart manually with scissors. Perhaps one of these would look nice on the front of your bag, like the "Poison" element I glued to the front of my green bag or the Boo ghost I used in my video. Mat it with a solid color to form a frame, and glue or Pop-Dot it to the bag.
- Double-stick tape works great for affixing the bag tab inside the bag. Glue works too, but if you have tape handy, use it!
I hope this project inspired you, and do make these cute bags for other holidays and occasions - Christmas, Baby Showers, Valentines, etc.! Happy crafting! ~Mary 🙂


9 Responses to “Mary's Corner - Spooky Tied Surprise Gift Bags”