

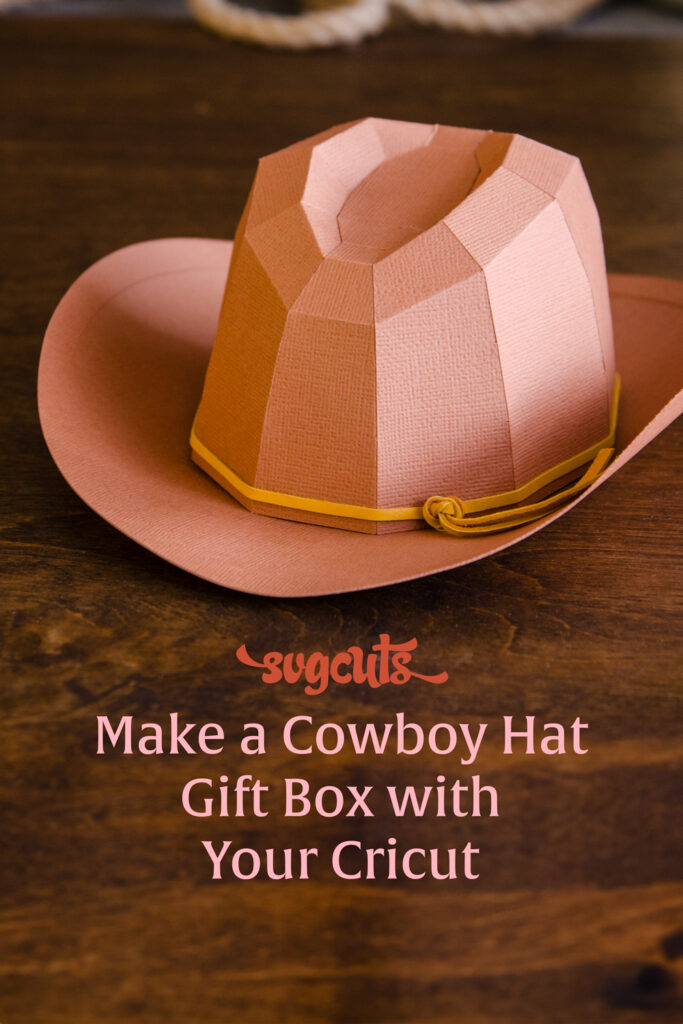
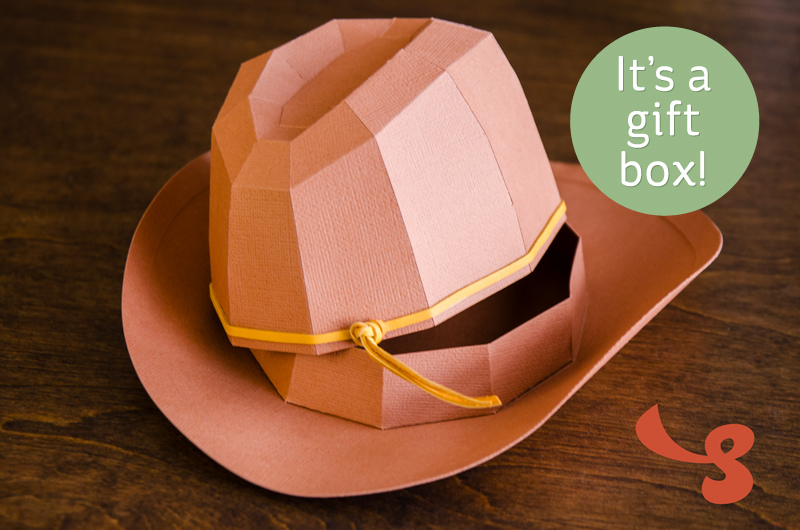
Would you like to learn to make a Cowboy Hat Gift Box with your Cricut? You're in the right place! I get it, paper crafting with a Cricut can feel intimidating. If you're ready to kick those doubts to the curb with me, keep reading!
Supply List
- the Cowboy Hat design
- medium brown card stock paper
- two sheets of 12x12"
- one piece of 8x12"
- paper crafting adhesive
- 1/8” wide leather cord (optional) about 14" length (as shown)
These instructions assume that you're using a desktop or laptop computer.
Order & Download the Cowboy Hat Design
Start by ordering and downloading the Cowboy Hat Design.
The Cowboy Hat is one of our most popular designs of all time. You won't be disappointed!
You can use your download with any cutting machine forever. We don't offer subscriptions or memberships. Also, if there's ever an update made to the design, it's yours at no charge.
Once you've ordered and downloaded the Cowboy Hat design, you'll need to begin by unzipping it.
Step 1: Unzip
Windows users can right-click on CowboyHat.zip and then on Extract All. Then, specify where you want to store the project folder. The original file (called CowboyHat.zip) can be deleted.
Step 2: View the Menu
The PDF Menu document in your download provides some additional helpful information. You can view it on your computer or device, or you can print it out.
Note: trying to directly open the SVG files on your computer generally won't work.
Step 3: Upload the Design in Cricut Design Space
- In Cricut Design Space, click New Project.
- Click Upload, then Upload Image.
- Click Browse and navigate to the project folder (called Cowboy Hat SVGCuts.com) and open it.
- Open the SVG Files folder, then the Extras folder.
- Select entire_cowboy_hat.svg and click Open.
- Click Upload.
- Select it under Recent Uploads and click Add to Canvas.
With everything still selected, click Ungroup. It is the button below the word Layers (top right area).
Step 4: Attach
First, click on one of the items labeled entire_cowboy_hat in the Layers window.
Next, click Attach. Then, repeat this for the other two "groups."
Attaching tells the software to keep the score lines with their shapes. Otherwise, the software puts them on separate mats during the next step.
Next, click Make. Then, proceed to cut out your shapes using your Cricut Explore or Maker machine.
Step 5: View the Assembly Tutorial Video
Next, you can view the Assembly Tutorial video for this design. It shows step-by-step instructions for making the design using the shapes you've cut out.
That's it! I hope you had a blast making your paper Cowboy Hat! Please share a photo or video of your creation with us on social media!
Mary Bonk - SVGCuts
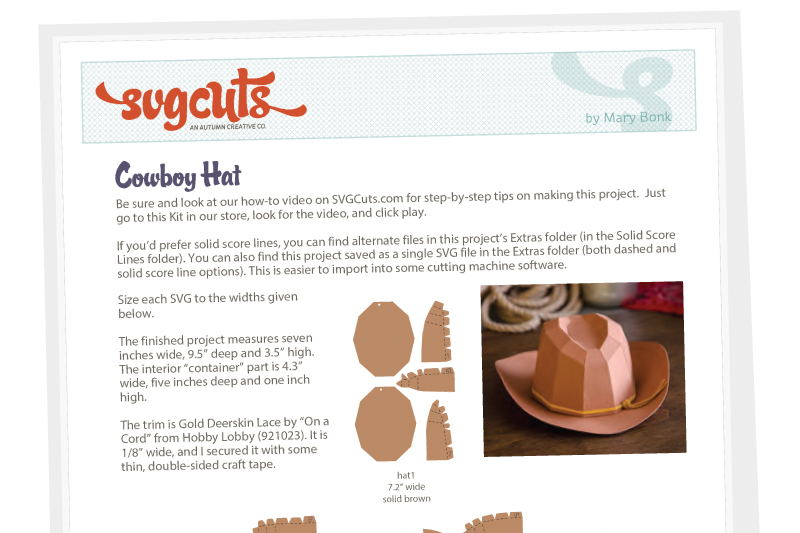
Paper Recommendations
The card stock that I recommend is textured card stock that's about 80#.
I like using Encore paper by 12x12 Cardstock Shop and American Crafts Card Stock paper. Generally, most by-the-sheet textured solid-color card stock paper from craft stores works well.
Glue Recommendations
Scotch Quick Dry Adhesive, Bearly Arts Precision Glue and Art Glitter Glue are my go-to adhesives.
Solid Score Lines
We also offer this design with Solid Score Lines instead of dashed cut lines for folding. You can find these in your download. They are in the Extras folder, in the Solid Score Lines folder.
Simply select a score lines layer in the Layers window and then change its Operation from Basic Cut to Score. Repeat for any other solid score lines. Attaching is still necessary.
Your machine will expect you to insert a scoring wheel or stylus during cutting.
12x12 Cardstock Shop Coupon Code
I like buying my solid-color card stock paper here. They also have incredible specialty paper. Use code SVGCUTS for 10% off everything but adhesives and clearance items! Shop here.
Affiliate Disclosure
Some links above are affiliate links, which means we may earn a small commission should you click on one and place an order. Thank you!