

I've got a confession to make. I've never done "print-and-cut" on ANY cutting machine. Not on my Sizzix eclips2, not on my Silhouette Cameo, not on my Cricut Explore Air 2 or Maker. I was intimidated.
That just changed! Today, Michelle contacted me, trying to create the project you see here. Super cute idea, right?
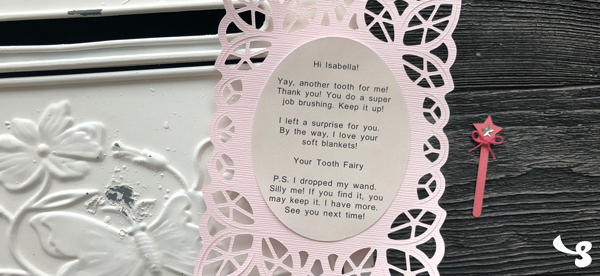
I tinkered until I was able to create the project. Love it! Here's how I did it.
Supplies
Cricut Explore One, Explore Air, Explore Air 2 or Maker cutting machine
Free online Cricut Design Space software
A desktop printer
Our Lace Frame freebie
6x7" card stock paper (your choice of color)
Directions
Download the Lace Frame from our Free Designs (click here) and save it to your computer in a location that makes sense to you.

Un-zip your download. To do that on a Windows computer, you can right-click on svgcuts-091614-lace-frame.zip and go to Extract All and follow the prompts. On a Mac computer, you can simply double-click on the zip file.
Launch the Cricut Design Space software and sign in if necessary.
Click New Project, Upload and then Upload Image.
Navigate to svgcuts-091614-lace-frame --> Extras --> Lace_Frame.svg and click OK if necessary and then Save.
Select it under Recently Uploaded Images and click Insert Images.
The two-layer design appears on your mat.
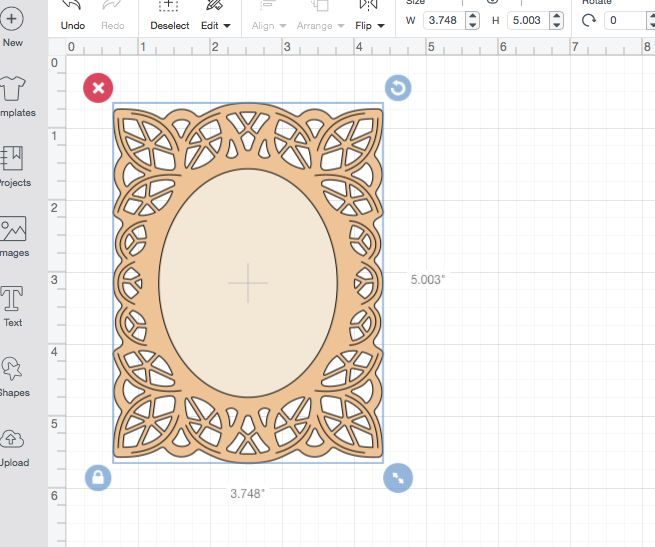
With both layers selected, click Ungroup.
Select the bottom layer and click the Attach button (lower right corner). This keeps the decorative lines together with the bottom layer.
This brings the bottom layer to the top, so you drag them back into the correct order in the Layers window.
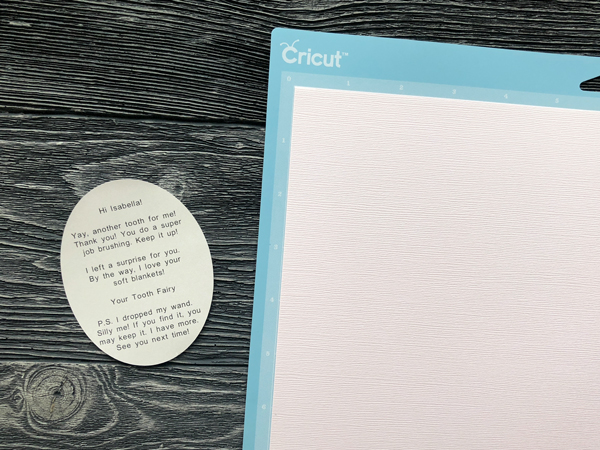
Click the Text button and enter or paste your desired text (wait for it to load).
Sample text:
Hi Isabella!
Yay, another tooth for me!
Thank you! You do a super
job brushing. Keep it up!
I left a surprise for you.
By the way, I love your
soft blankets!
Your Tooth Fairy
P.S. I dropped my wand.
Silly me! If you find it, you
may keep it. I have more.
See you next time!
Change font size to something small like 10. Move the text on top of the oval. Change the alignment to Center instead of Left.
Click the scissor icon in the Text layer in the Layers window and select Print (instead of Cut). Instead of a scissors icon, it should now show a printer icon.
To center the text precisely, you can select all, then use "Center Horizontally" and "Center Vertically" in the Align menu.
With all selected, I changed the height of my design to 5.5" (slightly larger than the default size).
Next, change the font to something that’s under “System” in the drop-down menu to use a font that you already have on your computer (free) or you can purchase fonts from Cricut. I'm using Arial, which is already on my computer.
Adjust Line Space value if necessary.
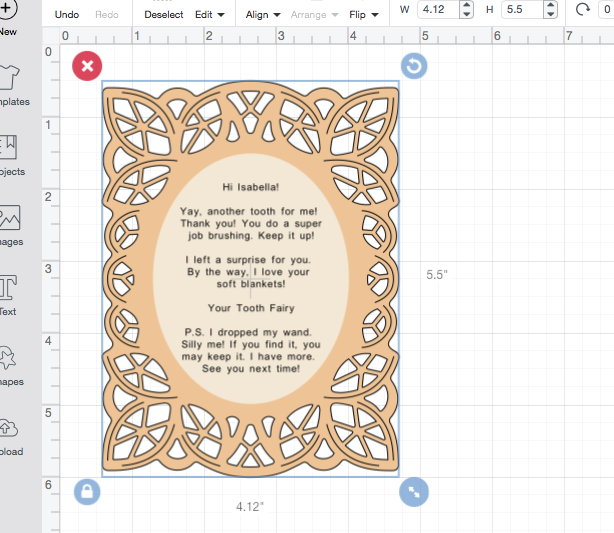
When you’re happy with the placement and style of the text inside the oval, select the text layer and the oval layer and click Flatten.
Let's Make It!
Next, click Make It, click Continue and then click Send To Printer.
Make sure your printer is on and selected in the Printer drop-down menu (mine is shown below - yours will probably be different), and click Print.

Next, place the printed sheet on your cutting mat in the top left corner.
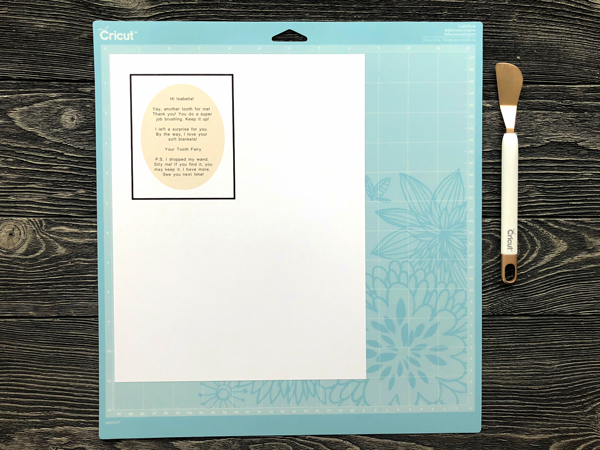
Then on-screen, choose your material (in my case it is Copy Paper).
Load your mat and press the Go button.
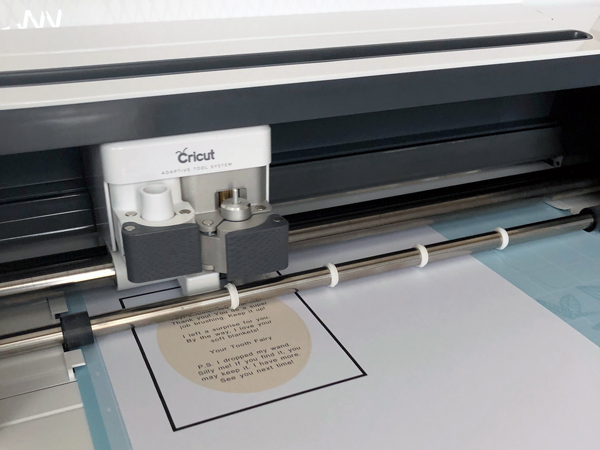
The machine cuts an oval shape.
Unload your mat, remove printed oval, and set it aside.
Load your mat with paper of your choice for bottom layer (**change on-screen material type if necessary, for example, to card stock**) and press the Go button. The machine cuts the bottom lace layer.
Unload your mat, remove the bottom lace layer affix the top layer to the bottom layer.
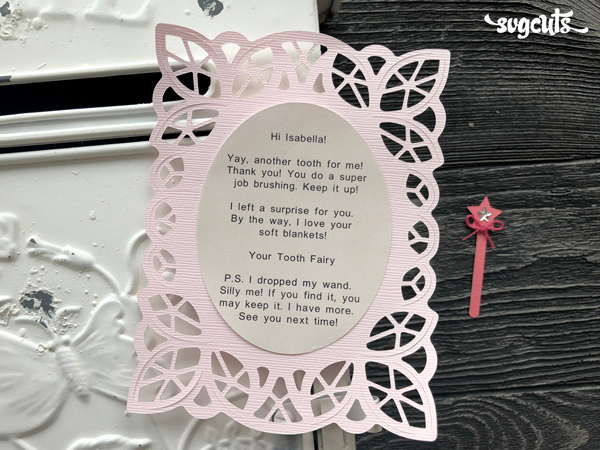
If you're using copy paper like I did for my printed oval, you may want to use something like double-sided tape instead of glue, which tends to wrinkle the paper.
That's it! If you'd like to cut out and include the little "wand," for your child to discover too, you can find it in your download's Extras folder.
Thanks to Michelle for the awesome project idea! Happy crafting!
~Mary