


This wine box is a great way to say 'Thank You' to a special hostess during the Christmas season. This all goes together in about an hour, make several and you are ready for the party season!
SVG Collections Used
![]() Cards for Moms SVG Kit
Cards for Moms SVG Kit
![]() North Pole Express SVG Kit
North Pole Express SVG Kit
![]() Classic Gift Boxes SVG Kit
Classic Gift Boxes SVG Kit
![]() Christmas Cookie Party SVG Collection
Christmas Cookie Party SVG Collection
![]() Merry and Bright SVG Kit
Merry and Bright SVG Kit
![]() Spirits of Christmas Past SVG Kit
Spirits of Christmas Past SVG Kit
![]() Miss Baker's Classroom SVG Kit
Miss Baker's Classroom SVG Kit
Supplies Used
- Cardstock (Pink Paislee's Snow Village)
- Scotch Quick Dry Adhesive
- 4 Large Pearls
- 6 Medium Pearls
- Gold Glitter
- Pop Dots
- Snowflake Embossing Folder
- Hampton art stamp SCO667
Dimensions
| Cards for Mom's SVG Kit | ||
| card_base.svg | 6.983"wX4.641"h | Grey |
| interior.svg | 3.103"wX4.253"h | White |
| North Pole Express SVG Kit (Package) | ||
| bow.svg | 2.606"wX0.956"h | Stripe |
| bow.svg | 3.077"wX1.129"h | Stripe |
| bow.svg | 3.643"wX1.337"h | Stripe |
| bow.svg | 4.052"wX1.487"h | Stripe |
| Classic Gift Boxes SVG Kit (Wine Box) | ||
| bottom_and_liner.svg | 7.898"wX2.970"h | Light Blue |
| botttom_sides1.svg | 7.848"wX8.140"h | Light Blue |
| bottom_sides2.svg | 7.848"wX8.140"h | Light Blue |
| lid1.svg | 5.516"wX7.540"h | Light Blue |
| lid2.svg | 5.516"wX7.540"h | Light Blue |
| Christmas Cookie Party SVG Collection | ||
| tree_middle.svg | 1.804"wX1.306"h | Brown Stripe |
| Merry and Bright SVG Kit | ||
| (Tri-Fold Shutter Card) | ||
| red_dark.svg | 3.198"wX2.716"h | Blue |
| red_dark.svg | 3.198"wX2.716"h | Blue |
| red_dark.svg | 3.167"wX2.196"h | Blue |
| red_pattern.svg | 3.167"wX1.169"h | Blue |
| Spirits of Christmas Past SVG Kit (Extras) | ||
| boxwood_foliage.svg | 1.472"wX3.609"h | Stripe |
| boxwood_foliage.svg | 1.214"wX2.975"h | Stripe |
| cedar_foliage.svg | 3.912"wX2.223"h | Stripe |
| cedar_foliage.svg | 3.623"wX2.059"h | Stripe |
| cedar_foliage.svg | 3.212"wX1.825"h | Stripe |
| Miss Baker's Classroom SVG Kit | ||
| (Scrapbook Page) | ||
| panel_small_bottom.svg | 1.330"wX7.894"h | Brown Stripe |
| panel_small_top.svg | 1.118"wX7.663"h | Blue |
| Basic Shapes | ||
| Rectangle | 0.191"wX1.526"h | Brown Stripe |
| Star | 1.245"wX1.516"h | Brown Stripe |
Instructions
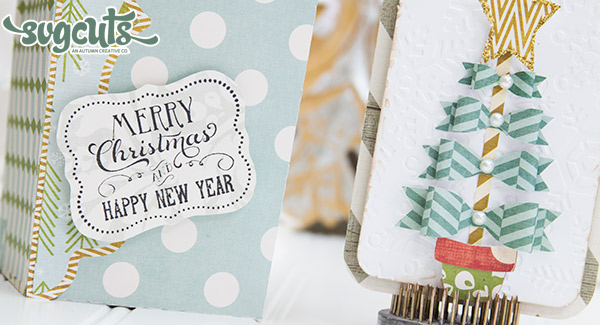
- Cut and assemble the wine box. Cut and glue the trim on the left side of the box bottom. Next I stamped my paper and trimmed by hand. Attach it with pop dots.
- Cut the poinsettia pieces and assemble. Glue on pearls and dab with glue and sprinkle the gold glitter in the center. Layer it with pop dots for dimension and use pop dots to attach to the wine box.
- Cut all of the greenery and glue around poinsettia as shown on photo.
- Cut out the card pieces. Emboss front panel if desired. Glue the long rectangle to the center of the panel. Cut the star and place glue around the edges, then sprinkle the glitter. Attach the tree pot with a pop dot. Assemble all of the bows and glue down. Next attach the larger pearls as shown.
Design Tips

Kathy Helton - SVGCuts Designer
- As I mentioned, make several while you are cutting and assembling. This would also make a cute Christmas gift for a wine lover.
- I made some very small ones with the individual 4 packs of wine. They are adorable.
- Always remember to hold from the bottom!I hope you enjoy making this cute wine box. So easy to make and fun to give! Merry Christmas to you and your family!