


Christmas is the ultimate holiday for parties and truth be told, you can never have too many centerpieces for such festive events. For your next holiday gathering, how about placing a fun and festive topiary next to the eggnog and pecan pie, it'll
be a wonderful addition to your tablescape.
SVG Collections Used
![]() Thank You For the Music SVG Kit
Thank You For the Music SVG Kit
![]() Santa's Visit SVG Kit
Santa's Visit SVG Kit
![]() 3D Wintergreens SVG Kit
3D Wintergreens SVG Kit
Supplies Used
- red cardstock
- green cardstock
- brown cardstock
- pattern paper (Snow Village by Pink Paislee)
- gold glitter cardstock
- brads
- bakers twine
- gold ribbon, wide and narrow width
- 3/8" wooden dowel
- 5" styrofoam ball
- hot glue
- spray adhesive
- chunky glitter
- floral foam
- snow tex, (fake snow)
- white acrylic paint
- foam brush
- sanding block
- vintage photo distressing ink
- spanish moss
Dimensions
| Thank You For The Music SVG Kit | ||
| (3D flowers) | ||
| Four_Flowers.svg | 11.400”W x 11.400”H | red cardstock |
| Filler_Flowers.svg | 8.000”W x 6.823”H | red cardstock |
| Santa’s Visit SVG Kit | ||
| (Drum) | ||
| Drum1.svg | 11.500”W x 5.523”H | pattern paper |
| Drum2.svg | 11.500”W x 5.500”H | pattern paper |
| Drum3. svg | 11.500”W x 5.500”H | pattern paper and glitter cardstock |
| Accent_panels1.svg | 11.500”W x 1.920”H | pattern paper |
| Accent_panels2.svg | 11.500”W x 1.920”H | pattern paper |
| rim_accents.svg | 11.500”W x 3.487”H | glitter cardstock |
| 3D Wintergreens SVG Kit | ||
| (Poinsettia-Spindly) | ||
| petals1.svg | 10.000”W x 5.700”H | red cardstock |
| petals2.svg | 10.000”W x 4.314”H | red cardstock |
| leaves.svg | 10.000”W x 5.116”H | green cardstock |
| (Holly and Berries) | ||
| holly.svg | 5.000”W x 3.801”H | green cardstock |
| Pinecone | ||
| pinecone.svg | 9.000”W x 9.041”H | dark brown cardstock |
Instructions
- To begin your topiary, first paint a 3/8" wooden dowel, about 12 inches long, with white acrylic paint and set aside to dry.
- Next begin making the base of your topiary, which is the drum file from the Santa's Visit kit. I did not change or resize and of the files for the drum, so it' as easy as opening up the files, and cutting them. I used a light gold glitter cardstock for the rim and top, and pattern paper for the panels in the middle. Once you have all of your files cut, begin to assemble them. I highly recommend watching the assembly video that accompanies the collection. I used brass brads and red and white bakers twine to finish the drum.
- Insert a piece of floral foam into the drum packing it into all of the voids, and I often add some hot glue at the bottom of the drum to safely secure it in place.
- Next lets work on the topiary.
- Begin by cutting out 32 flowers from the Thank You for the Music kit. You will need 8 sheets of cardstock, for the flowers, plus and additional sheet, (or two) for the filler flowers. You will cut 8 sheets of the Four_Flowers.svg for a total of 32. It seems like a lot, but trust me, you will use every single one of those flowers and then some.
- To assemble the flowers, I laid all the layers in groups, then began to curl the edges. Adhere the bottom layer with a dab of hot glue, then add all the additional layers together and secure with a brass brad. Continue on, and enlist the help of
your older children like I did, to help the process along. Keep going until all of your 32 flowers are assembled and set aside. - Cut a bunch of filler flowers and curl the edges, those are awesome to use to fill in gaps when your assembling your topiary.
- Next from the 3D Wintergreens kit, cut out the holly.svg and again, I did not resize these, they are the perfect size to work with. Cut out about 10 or so, then curl the edges, and ink with distressing ink.
- Now lets assemble the topiary.
- Wrap the pole of the topiary with narrow width gold ribbon, securing at the top and bottom with a dab of hot glue, then insert into your styrofoam ball. Next, remove the dowel, and squirt some hot glue into the void you just created, then re-insert the dowel. This will keep it nicely secured.
- Begin by adhering the flowers to the styrofoam ball using either long pins, (or hot glue), working around the entire ball. Adhere them close together, trying not to leave wide gaps. You'll have gaps, it's inevitable, just try to keep them close. When all your flowers have been adhered, then next step is to adhere the holly leaves. Simply add a dab of hot glue to the bottom and insert them into the gaps. Work around the topiary until you've filled all the bigger gaps.
- Then finally add the smaller filler flowers to any smaller gap. The filler flowers are an amazing addition, I didn't think I was going to use any, then found I was addicted to adding them. They really add a nice touch.
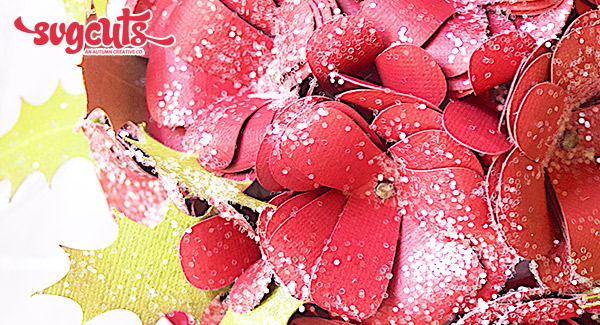
- To finish the top of the topiary, lightly spray adhesive and sprinkle on some chunky glitter to give it a nice frosted look.
- Next, add the topiary to the floral foam. Push the dowel through the floral foam, remove, add some hot glue to the void you just created and re-insert the dowel. Then add some spanish moss to the top of the floral foam to hide it.
- You can stop here if you'd like, your topiary is basically finished, but I think you should take it a step further by adding some Wintergreens to the top of the drum. Let's get started.
- From the 3D Wintergreens kit, cut out one poinsettia_spindly. I did not resize the file, it's perfect as is and assemble it together, inking and curling the edges, then once assembled, add a little fake snow, (Snow-Tex) to the edges, spray with adhesive and sprinkle on glitter. Adhere to the top of the drum using hot glue.
- Cut out one pinecone from the same 3D Wintergreen kit, keeping the original size, and assemble according to the assemblyvideo that accompanies the collection. Finish by dabbing on some fake snow, (Snow Tex) and glitter, then adhere along with a holly branch left over from your topiary assembly, to the top of the drum.
- And finally, create a bow using gold shimmer ribbon and adhere it on the top as well.
- Enjoy your topiary for many years to come!
Design Tips

Hilary Kanwischer - SVG Cuts Design Team Member
- To create a fun snowy scene, use glitter to add sparkle to your finished projects.
- Take the time to curl all the flowers and wintergreens in the project. The end result will be worth the effort and your topiary will literally look alive.
- Add some glitter cardstock to your project, the extra shimmer will really make it all tie together for one beautiful centerpiece.
Christmas is such a wonderful holiday and I love to create handmade pieces to make Christmas that more special. I hope I've inspired you to create this wonderful topiary, it' my favorite project by far. Merry Christmas!