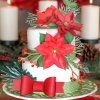
Impress your guests this Holiday Season by decorating a cake with your own SVG Cuts cake embellishments. You all know how to cut paper, now just bake a cake and dress it up!
SVG Collections Used
![]() 3D Wintergreens SVG Kit
3D Wintergreens SVG Kit
![]() Spirits of Christmas Past SVG Kit
Spirits of Christmas Past SVG Kit
![]() Gift Boxes SVG Kit
Gift Boxes SVG Kit
![]() Doilies SVG Collection
Doilies SVG Collection
Supplies Used
- Cake (use your favorite cake recipe) For this cake, the bottom was baked in a 6 inch cake pan, and top in a 5 inch pan (approx. 7 inches tall). Frosted with butter cream icing and covered with fondant.
- AC Card stock
- Recollections Card stock
- Beads/Rhinestones
- White, black, and brown inks for distressing
- Paper slicer
- Scotch Quick-dry glue
- Scotch ATG and glue
- Heat glue gun
- Toothpicks
- Scissors
- Paintbrush and water
Dimensions
| 3D Wintergreens SVG Kit (Amyrillis) | ||
| center. svg | 1.520" H x 3.840" W | Green |
| petals.svg | 4.425" H x 3.840" W | Red |
| (Boxwood) | ||
| boxwood.svg | 1.155" H x 10.000" W | Green |
| (Evergreen) | ||
| evergreen.svg | 4.000" H x 11.300" W | Green |
| (Evergreen - Long Needles) | ||
| evergreen_long.svg | 2.975" H x 7.740" W | Green |
| (Pinecone) | ||
| pinecone.svg | 5.455" H x 5.430" W | Kraft |
| (Poinsettia) | ||
| leaves.svg | 3.645" H x 7.385" W | Green |
| petals1.svg | 3.605" H x 7.385" W | Red |
| petals2.svg | 2.525" H x 7.385" W | Red |
| (Poinsettia - Spindly) | ||
| leaves.svg | 3.185" H x 6.225" W | Green |
| petals1.svg | 3.550" H x 6.225" W | Red |
| petals2.svg | 2.685" H x 6.225" W | Red |
| Spirits of Christmas Past SVG Kit (Extras) | ||
| boxwood_foliage.svg | 4.020" H x 1.640" W | Green |
| branch_short_bottom.svg | 2.255" H x 3.820" W | Kraft |
| branch_short_top.svg | 1.010" H x 3.820" W | Red (adhesive jewels) |
| cedar_foliage.svg | 2.515" H x 2.065" W | Green |
| Gift Boxes SVG Kit (Extras) | ||
| bow_large.svg | 6.090" H x 6.405" W | Red |
| Doilies SVG Collection | ||
| 1.svg | 10.195" H x 10.130" W | Green |
Instructions
- Start with baking your favorite cake. I frosted mine with butter cream icing and covered it with fondant. I know not everyone can do that. NO worries! You can just use icing sugar, sprinkle it on the cake, creating the look of snow! If you are not a baker, don’t worry about that either, just buy one! You can still take credit for beautifying it!
- Everyone’s cake will be different, but keep in mind the height of your cakes to help you determine the scale for your flowers and other pieces you choose to decorate with.
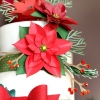
- Flowers: Cut out as many flowers as you like, assemble as directed. Ink and embellish them as you would for any other paper project.
- Once your pieces are completed, you will need to attach them to a toothpick or a skewer. Turn on your hot glue gun.
- On the back side of the centers of each flower drop a little bead of hot glue, let it dry. Repeat this step once more. Once both the glue drops have dried, place a third bead of glue. Insert a toothpick into the middle of the bead. You will need to hold the toothpick while the glue dries. At this point you may also want to turn the flower face up so that the glue will run down the toothpick. The toothpick will add height to your flowers and will keep the papers from touching the cake, avoiding any grease absorption.
- With the other pieces that have stems (pine cone, boxwood, evergreens, etc.) just attach the toothpick to the stem with your hot glue.
- Measure the top of the cake plate you are going to use, cut your doily accordingly. Once it is cut, stick it onto your plate with a little double sided tape. (This will keep the cake from sliding off the plate)
- Place your cooled and frosted cake centered on top of the doily.
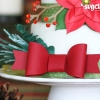
- Finish the bottom of the cake by adding a border. For this cake I just cut 1 inch high pieces of paper using a paper slicer and wrapped it around the cake. Snip off excess length with scissors. Dip the tip of a clean paintbrush in a little water and slightly wet the base of the cake where your paper will touch. When wet fondant is sticky and acts as glue to hold the border in place. (Ribbon could also be used here instead)
- Arrange and insert your flowers into the cake. Angle the direction of the toothpick to achieve your desired look. (I used the tip of a pair of scissors to pinch, hold, and push the toothpick into place. This prevents damage to the flowers while pushing the toothpick into the cake)
- Place the cake back in the fridge until just before your guests arrive.
Design Tips
- Once my cakes have cooled on the counter for about 10 minutes, I remove them from the pans and wrap them with a plastic wrap. I then place them in my freezer with the top side down (flattening the tops for me). Leave in the freezer until you are ready to frost the cakes. Believe me, this will make frosting your cake way easier and your cake will be super moist!
- Paper and grease do not mix well, so if you are covering your cake with any type of butter cream icing try to avoid direct contact with your paper embellishments. Ensure you build up the toothpick with the hot glue, remember, the higher the glue the further the distance from the cake.
- Still unsure of what your icing will do to the paper, test it with some scraps of paper.
- For extra grease protection, indiscreetly place a piece of parchment paper directly under where your pieces will be pushed into the cake.
- Fondant cakes do well with paper. I had no greasy spots on any of my papers, including the paper I wrapped directly onto the base of the cake.
Now that you know how to create your own Christmas Cake a la SVG Cuts, you can wow your guest at the next holiday, birthday, wedding, or Christmas party! I really hope you have enjoyed this and if you make your own Christmas Cake this season, don’t forget to share it on the SVG Cuts Facebook Page and wow the rest of the fans. Happy cake decorating!




4 Responses to “Christmas Cake a la SVG Cuts by Ilda Dias”