
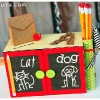
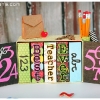
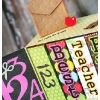
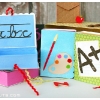
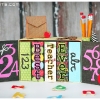
It's that time of year again! Teacher Appreciation day is coming up on May 3rd! Time to show those teacher's how much we appreciate them and what they do for our children! I came up with this little book cabinet that holds book goodie boxes! These are large enough for candy, giftcards, etc.
SVG Collections Used
1. ![]() Big Boutique Boxes SVG Kit
Big Boutique Boxes SVG Kit
2. ![]() Betty's Bags and Boxes II Collection
Betty's Bags and Boxes II Collection
3. ![]() A2 Lace Edged Cards SVG Collection
A2 Lace Edged Cards SVG Collection
4. ![]() Back to School SVG Collection
Back to School SVG Collection
5. ![]() Stick Figure Families SVG Collection
Stick Figure Families SVG Collection
6. ![]() Crafty Mice SVG Collection
Crafty Mice SVG Collection
7. ![]() December Doorhangers SVG Kit
December Doorhangers SVG Kit
Dimensions
| Big Boutique Boxes SVG Kit (Rectangle) | ||
| lid_top.svg | 3.50w x 4.50h | various |
| box_sides.svg | (see instructions) | various |
| lid_top.svg (cut 2) | 6.85w x 3.50h | yellow |
| lid_top.svg | 6.85w x 4.50 | yellow |
| Big Boutique Boxes SVG Kit (Cube) | ||
| box_side.svg | 4.039w x 5.144h | yellow |
| A2 Lace Edged Cards SVG Collection | ||
| hearts_horiz_card_alt.svg | 7.65w x 4.350h | various |
| Stick Figure Families SVG Collection | ||
| socks.svg | 2.00h | grey |
| spot.svg | 2.25h | grey |
| Back to School SVG Collection | ||
| numbers.svg | 3.900h | pink |
| chalkboard_white.svg | (see instructions) | black |
| handwriting.svg | 3.50w | black |
| apple_bottom.svg | 1.25w | white |
| apple_mid.svg | 1.25w | brown |
| apple_top.svg | 1.25w | red |
| apple_bottom.svg | .75w | white |
| apple_mid.svg | .75w | green |
| apple_top.svg | .75w | red |
| school_yellow.svg | 3.00w | yellow |
| school_white.svg | 3.00w | white |
| school_blue.svg | 3.00w | blue |
| school_red.svg | 3.00w | red |
| p1.svg | .319w | yellow |
| p2.svg | .319w | tan |
| p3.svg | .319w | grey |
| p4.svg | .319w | pink |
| calc_bot.svg | 1.50w | grey |
| calc_mid.svg | 1.50w | white |
| calc_top.svg | 1.50w | blue |
| a_plus.svg | 3.00w | printed black |
| scissors.svg | 1.00w | grey |
| cray1.svg | .371w | various |
| cray2.svg | .371w | various |
| cray3.svg | .371w | various |
| glue_bottom.svg | 1.00w | orange |
| glue_top.svg | 1.00w | white |
| Crafty Mice SVG Collection | ||
| palette.svg | 2.00w | tan |
| palette_top.svg | 2.00w | various |
| pbrush_bristles_bottom.svg | .263w | off white |
| pbrush_handle_bottom.svg | .263w | red |
| pbrush_top.svg | .263w | brown |
| ruler_bottom.svg | 4.50w | black |
| ruler_top.svg | 4.50w | tan |
| Betty's Bags and Boxes II Collection | ||
| pointy_flap_bag.svg | 6.650w | light brown |
| December Doorhangers SVG Kit (extras) | ||
| box.svg | 5.063w | green polka dot |
| SCAL Shapes Library (basic) | ||
| rectangle (cut 4) | 3.42w x 4.50h | black |
| circle (cut 12) | .80w | green |
| rectangle (cut 5) | 3.00w x 4.00h | various |
| Fonts (Gungsuh) | ||
| Best | 1.00h | black |
| Ever | 1.00h | black |
| Teacher | 3.849w | black |
| Dog | 1.00h | grey |
| Fonts (Loved by the King) | ||
| Cat | 1.00h | grey |
Instructions
Note: ALL box files used need to be 'broken apart' before sizing! Size with 'keep proportions' UNCHECKED.
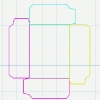
- You will start by creating the cabinet. Cut two lid files at 6.85w x 3.50h and one at 6.85w x 4.50h. The two 3.50h pieces are your top and bottom of the cabinet. The 4.50h piece is the back. You will need to cut the sides now. I have included a photo showing how I welded two side pieces. The sides are box_side.svg in the 'cube' folder in the Big Boutique Boxes SVG Collection. Make sure 'keep proportions' is unchecked and size two box_side.svg's to 4.039w x 5.144h. One of the files you will want to rotate clockise 4 times and layer them as shown in my example. 'Select all' and check 'weld'. Cut two of these. Score and adhere to the lid pieces to create the cabinet. I also cut additional lid pieces to layer to make the cabinet more sturdy!
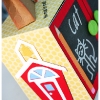
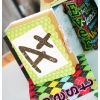
- You will now create the cabinet doors. Cut four SCAL basic shape rectangles sized to 3.42w x 4.50h. You will have two 'tabs' left on the sides. This is what you will use to attach these 'doors'. You will sandwich the tab between two of the rectangle files. Make sure you line them up evenly! The red frame was created in SCAL by layering a smaller rectangle over the 3.42 x 4.50 piece so when it cut it created a window (Do NOT weld them, just layer!). I was going for a chalkboard look! Open and close the doors a few times to 'break them in'.
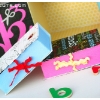
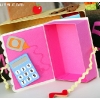
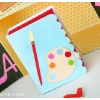
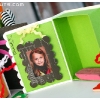
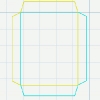
- Time to create the books! You will be working with the files from the Big Boutique Boxes RECTANGLE file. Open the lid_top.svg file and size to 3.00w x 4.50h. Open the box_sides.svg file. Break the files apart and make a duplicate of the longer and shorter side (so four sides total). Size the LONGER sides to 4.500h x 1.546w and the SHORTER sides to 3.440w x 1.546h. You will want to rotate the files and weld them as shown in my sample. Cut five of these and score and adhere the tabs. You now have the base of the book. To make the cover, cut your A2 Lace Edged Cards file as listed in the dimensions table. Score these at 3.20", then from that score line, score again at 1.25". Fold and wrap around the book base. If you're using a ribbon to tie them, make sure you sandwich it between the back cover and book base before adhering. To create the inside of the cover cut rectangles from your SCAL shapes library to 3.00w x 4.00h and adhere them to the inside of the cover and sandwich your ribbon between them. Now your books are done!
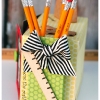
- Lastly, the pencil holder! Cut your December Doorhanger box.svg file as noted in the dimensions table. Score and adhere to the side. I centered mine and added a bow!
That's it! The base of your cabinet is complete and now you can decorate it!
Designer Tips
- For the knobs I layered 6 circles and used a 3d foam adhesive to make them pop up! I embossed the top circle to give the knob some texture.
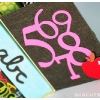
- The 'A' on top of the cabinet is cut freehand from cardboard. A last minute add, but it came out cute and looks like a child could have done it!
- Inking and embossing, as always!
- The little lunch bag can also have a few pieces of candy or an eraser in it! It would be cute to write the child or teacher's name on it! I kept it closed with a piece of double sided tape.
- I added glossy accents to the paint blobs and the 'glue'. I thought it looked really cute used as glue, we all know how messy kids are with it! I am pretty sure my 5 year old thinks it's lotion!
- To help the text stand out a bit on the books I created a rounded shadow in SCAL in bright colors.
Products Used
- ColorBox Ink
- Pink by Design stamps
- Stripe Ribbon from My Minds Eye
- Ric rac trim from Joann's (only a buck for 6'!)
- DCWV paper stacks Citrus, Blossom Song, Lemon Flower and Grade School
- Solid cardstock is American Crafts - pumpkincartcrafts.com
Thank you so much for taking a look at my project! I truly hope it inspires you and gets you in the crafting mood to create something for you child(ren)'s teacher! if you giev this project a try, we'd love to see it on SVG Cuts Facebook page! Happy crafting, friends!
--Tamara



12 Responses to “Tamara's Corner - Teacher's Book Cabinet”