
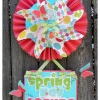
I always try to have a seasonal piece hanging on my front door. I think the Vintage Rosette is one of my favorite sets, so with some designer paper and tropical AC cardstock, I made this gorgeous door hanging! Enjoy!
Supplies
- Wire
- Glue gun
- Buttons
- Eyelets
- Eyelet Setter Tool (Cropodile)
- Ribbon
- Designer Paper/Cardstock
SVG Collections Used
1. ![]() Vintage Paper Rosettes
Vintage Paper Rosettes
2. ![]() Breezy Meadow Butterflies
Breezy Meadow Butterflies
3. ![]() Pinwheel Freebie
Pinwheel Freebie
Dimensions
Here are the exact shapes, sizes and colors I used. Size to dimensions shown below with "Keep Proportions" checked in the Shape Properties window, unless otherwise noted.
| Pinwheel Freebie | ||
| Pinwheel_bottom.svg | Designer Paper | 7" |
| Pinwheel_top.svg (Mary has a tutorial) | Designer Paper | 7" |
| Breezy Meadow Butterflies | ||
| 7_bottom.svg (Cut 1) | Glitter Paper | 2" High |
| 7_bottom.svg (Cut 1) | Glitter Paper | 1.5" High |
| 7_bottom.svg (Cut 2) | Glitter Paper | 1.75" High |
| 7_bottom.svg (cut 2) | Glitter Paper | 1.5" High |
| Vintage Paper Rosette's | ||
| rosette1_unscored.svg (Cut 3 - see my note for details) | AC Cardstock | 9" Wide |
| Circle.svg (cut 2) | AC Cardstock | 6" |
| Basic Shapes Library | ||
| square_rounded.svg | AC Cardstock | 5.25 x 6.5 |
| square_rounded.svg | AC Cardstock | 5.5 x 6.75 |
| Font - Chick | ||
| Spring Has Sprung | Glitter Paper | 1" |
| Spring Has Sprung (shadow/blackout, see note for how I do this) | Glitter Paper | 1" |
Instructions
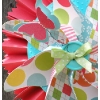
- Cut layers for the pinwheel. Assemble. Mary has a video tutorial on this and it is not hard to do (Click Here For the Video). Follow along with her and you will do just fine. Note, I only made the pinwheel. I did not put it on a stick, so you won't have to do that part. Just the assembly. It is best to use double sided designer paper for this as you will see both sides. I added a large button to the front after it is assembled. Note: use a long enough wire because this will go through the front of the rosette to the back. I cut a second circle for the back to hide this wire.
- Cut layers for the rosette. I only use American Craft Cardstock. I am not fond of the tic marks for scoring so I always either delete them, or in this case used the file that is unscored. I scored mine in 1 inch intervals using my Scor-pal. I cut the circle and ran it through my Cuttlebug using the Swiss Dots folder. Not necessary, but gives added interest. I use my hot glue gun to assemble. I find that this holds the best for me and also gives a few seconds to get things into place. I am not a liquid glue lover (we don't get along to well)! LOL!
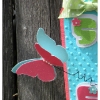
- Cut the layers for the butterflies. I used glittered cardstock for this although it may not show too well in the pics. You can use whatever you would like. I layered a smaller butterfly on top of a larger one and bent the wings up on the top one. Add gems or glitter in the body area. I attached them on wire that I curled around a pencil. Adds some cuteness!
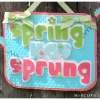
- Cut words and layer on their shadow. Add the entire sentiment to the rounded square. I used my Cropodile for punching the holes for hanging. Use an eyelet if desired, I did. Inking or embossing here will add interest and texture. This is how I do the bottom layer. Type your text and arrange how you like it. Highlight and ungroup. Highlight>Path>Union. Highlight>Appearance>ShadowBlackout. This will give you a nice, shaped bottom layer for your text.
- Assembly - Glue circle to front of rosette. Use wire from assembling the pinwheel and poke through the front circle out through the back of the rosette. Bend your wire over and hot glue in place. Hot glue the second circle to cover. Find the bottom center pleat in the rosette. On the backside, punch a hole in this pleat, this was a snug fit for the Cropodile, but I made it work. Thread ribbon through this hole and put each end of the ribbon through the holes on the rounded square. Adjust length to your liking. Glue ends down with hot glue. Tie small bows to cover these ends and glue in place. Find the center point at the top of the rosette, punch a hole, tie ribbon for hanging. Finally, add a large button to the center of the pinwheel and hot glue your wired butterflies where you would like them to be. Use your creative skills to embellish as you would like. Remember, sometimes less is best. Enjoy!
Design Tips
Use coordinating designer papers. They are made to match each other. Keep the patterns simple! Stick with only a couple of solid color cardstock to match. Add inking, embossing, ribbon, buttons, etc. This gives great interest. Use Mary's video for the pinwheel. I was confused the first time I tried to make this, that's why Mary did the video. She makes it really easy to do. Thanks, Mary! Kids love these, by the way. They really spin great.



5 Responses to “Cheryl's Corner - Springtime Rosette Door Hanging”