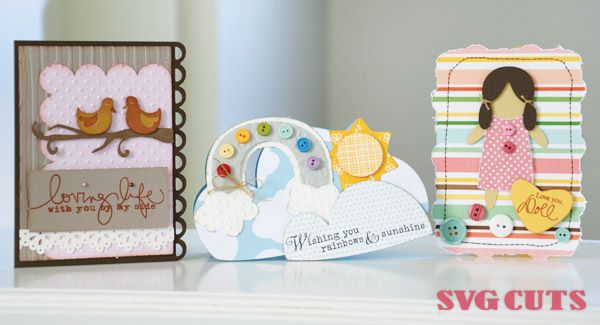
Besides Cricut and Cuttlebug crafts, my other huge obsession is stamps! Looking at my collection, no one would ever guess that I only started collecting a year ago! My favorite stamps are the sentiment ones, because I can use them together with my cuts to make very professional looking cards.
Rainbows and Sunshine Card
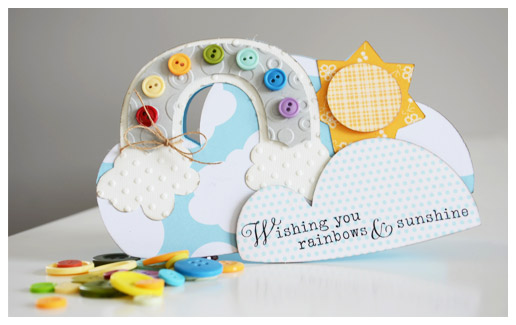
SVG Collections Used:
1. ![]() Robin's Return SVG Collection
Robin's Return SVG Collection
2. ![]() Beach Bum III SVG Collection
Beach Bum III SVG Collection
Dimensions
Here are the exact shapes, sizes and colors I used. Size to the dimensions shown below with “Keep Proportions” checked in the Shape Properties window.
| Robin's Return SVG Collection | ||
| rainbow_top.svg | 4.00" wide | light grey |
| rainbow_bottom.svg | 4.02" wide | cream |
| cloud_top.svg | 6.0" wide | blue patterned papers |
| Beach Bum III SVG Collection | ||
| vb_bot.svg | 1.2" wide | yellow checkered paper |
| sun_bot.svg | 1.2" wide | yellow flower paper |
Instructions:
1. On your SCAL virtual mat, open up all the files.
2. Arrange them the way you like the card to be, and weld them together.
3. Once you have the images welded, copy and paste the image, flip and rotate so that the image sits on top of the other image.
4. Overlap just enough to create the fold of the card, and preview the image. It should cut as one image and be in the shape of a card. This is the base of the card.
5. Cut each of the files all separately now, and attach them on to the base. Stamp the sentiment on the cloud. Using pop-dots for some of the layers will give dimension.
6. Embellish with buttons, and twine.
Design Tips
- Emboss some of your cuts to add texture.
- Rather than using all plain colored cardstock, add some fun by using simple patterned paper.
- Inking the edges (here, I used black) will also bring out the layers.
You're A Doll Card
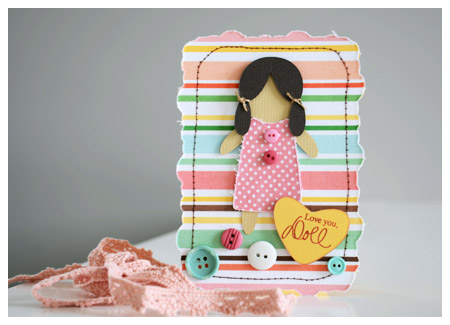
SVG Collections Used:
1. ![]() Santa's North Pole SVG Collection
Santa's North Pole SVG Collection
2. ![]() Robin's Return SVG Collection
Robin's Return SVG Collection
3. ![]() Candy Cherub Bears SVG Collection
Candy Cherub Bears SVG Collection
Dimensions:
Here are the exact shapes, sizes and colors I used. Size to the dimensions shown below with “Keep Proportions” checked in the Shape Properties window.
| Santa's North Pole SVG Collection (Toys) | ||
| doll_top.svg | 2.1" wide | dark brown |
| doll_middle.svg | 2.1" wide | pink dotted fabric |
| doll_bottom.svg | 3.5" wide | tan |
| Robin's Return SVG Collection | ||
| cloudy_bottom.svg | 5.5" wide (blackout) (2 welded) | yellow |
| cloudy_bottom.svg | 5.5" wide (blackout) (cut 2) | striped fabric and another for backing of fabric |
| Candy Cherub Bears SVG Collection (Cherries) | ||
| heart.svg | 1.6" wide | yellow |
Instructions:
1. Weld the two cloudy_bottom together to form a card. (make sure that one image is flipped)
2. The front base and doll's dress was cut out from an adhesive backed fabric paper (American Crafts) Cut another front base and attach it to the fabric cut out to give strength for sewing.
3. Sew around the border area of the front base cut out and adhere to the card base.
4. Cut the rest of the files (stamp the sentiment to the card) and attach them, again, using glue and pop-dots. The button was adhered with a glue gun.
Design Tips:
- If you can't find the fabric paper, you can also use fusible interfacing with any think fabric and should cut fine (with deep blade housing).
- Sewing does not have to be perfect. It adds to the "warm handmade" look of the card.
- Fabric and buttons (and ribbons) go really well together.
Loving Life Card
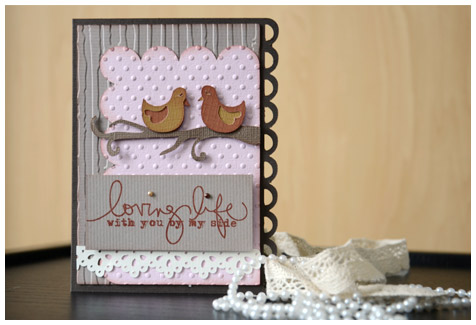
SVG Collections Used:
1. ![]() Be Mine Valentines SVG Kit
Be Mine Valentines SVG Kit
2. ![]() Robin's Return SVG Collection
Robin's Return SVG Collection
Dimensions:
Here are the exact shapes, sizes and colors I used. Size to the dimensions shown below with “Keep Proportions” checked in the Shape Properties window.
| Be Mine Valentines SVG Kit (Pretty Valentine) | ||
| card_base.svg | 8.5" wide | dark brown |
| light_pink.svg | 8.5" wide | light pink |
| red.svg | 8.5" wide | light brown |
| branch.svg | 3.6" wide | medium brown |
| birdie_top.svg | 1.0" wide (cut 2) | brick brown and mustard yellow |
| birdie_bottom.svg | 1.0" wide (cut 2) | brick brown and mustard yellow |
| Robin's Return SVG Collection | ||
| wide_lace.svg | 5.13" wide (weld 2) | cream |
Instructions:
1. Cut all the pieces, emboss as necessary, and ink the edges.
2. Stamp a sentiment on a cardstock and cut to its size.
3. Adhere onto the card base (I used ATG gun, Scotch quick adhesive and pop-dots). The wide lace needs trimming to fit the width of the card.
Design Tips:
- Using rhinestones/pearls on the dots of the "i" brings out the sentiment like I did on this card.
- Even though there are no patterned papers, using different embossing folders adds to the texture and dimension of the card.
Card making is a simple project, but you can get very creative with it. Choose a sentiment that you'd like to use, think about what image would convey that message (just choose one, try not to make the card too busy) and then pick the color scheme that you'd like to use for your cards. Go pick out the paper, and any embossing folders you'd like to use, then when you're all done putting together the card, add on any embellishments to give that "umph" to the card. It's also worthwhile to make cards because there's also the fun of giving. Have fun!
- Thienly



18 Responses to “Thienly's Corner - Just Because Cards”