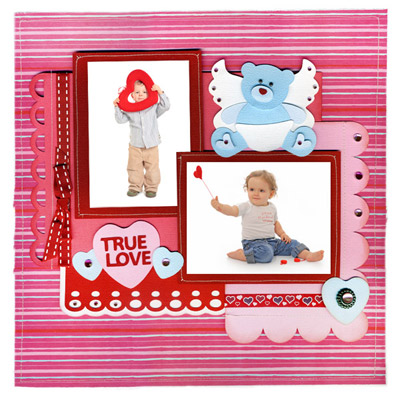
I am so excited to be debuting my first Design Team Project for SVG Cuts. For those of you that know me well you know I am passionate about scrapbooking. I do one scrapbook per year and do my best to keep up. My boys love looking through the albums and I like capturing the memories. Scrapping is my creative release. I crop at home and also like to join friends at Friday or weekend crops at my local scrap book store.
This first layout is for Valentine's Day. It is 12x12. All solid papers are AC Card Stock. Patterned paper in background from my stash.
SVG Collections Used:
1. ![]() Be Mine Valentines SVG Kit
Be Mine Valentines SVG Kit
2. ![]() Candy Cherub Bears SVG Collection
Candy Cherub Bears SVG Collection
3. ![]() Candy Heart Goodie Bags SVG Kit
Candy Heart Goodie Bags SVG Kit
Dimensions
Here are the exact shapes, sizes and colors I used. Size to dimensions shown below with "Keep Proportions" checked in the Shape Properties window unless otherwise noted with height dimensions.
| Be Mine Valentines SVG Kit | ||
| scalloped_corner.svg | 4.5" wide by 6.64" high | light pink |
| lacey_edge3.svg | 4.003" wide by 5.5" high | red |
| lacey_edge3.svg - select shadow - rounded 1.0 | 4.456" wide by 5.827" high | white |
| lacey_edge_wide.svg | 9.000" wide by 5.824" high | medium pink |
| Basic Shapes Library | ||
| Rectangle (uncheck proportions) | 8.625 x .5 | |
| Cut 2 | 5" wide by 4" high | dark red |
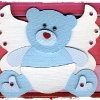
| Mint Bear from Candy Cherub Bears Collection | ||
| green1.svg | 1.107" wide by 3.014" high | light blue |
| green2.svg | 3.318" wide by 3.016" high | medium blue |
| nose.svg | 0.275" wide x 3.014" high | dark red |
| white.svg | 3.376" wide X 3.014" high | white |
| Candy Heart Goodie Bags Collection | ||
| box_part1.svg | import at 4.141" wide by 2.185" high - break apart and delete one heart. One heart measures 2.157" wide by 2.099" high | light pink |
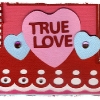
| true_love.svg | 4.599" wide by 0.414" high | dark red |
| box_part1.svg | 2.927" wide by 1.544" high- break apart and delete one heart. One heart measures 1.525" wide by 1.483" high | light blue |
| box_part1.svg | 1.894" wide by 0.999" high | light blue |
Instructions
- I Started with 12x12 White AC Card Stock.
- Take a piece of 12x12 paper and tear edges to 11x11 and adhere to the white stock. Stitch around the edge if you like.
- Cut, Ink and stitch background cuts and photo mats.
- Add the bear & hearts. Don't forget to add dimensional tape.
- Add ribbons and embellishments. I used gems, brads & ribbons.
- Add your photos. Crop them just inside the stitching.
Design Tips
- Don't be afraid to tear paper - it is fun and adds interest. Use a ruler for a straight tear.
- If you do stitch do not stitch over adhesive. Try it - it is a lot fun. The great thing about stitching on scrapbook pages is you don't have to be exact (like when making a dress).
- I did not ink the bear - I liked the clean look of him without inking.
Thanks for checking out my first DT Project. I plan to focus on scrapping and my collages for my first few projects and look forward to my next project.



7 Responses to “Amy's Corner - True Love Bear Layout”