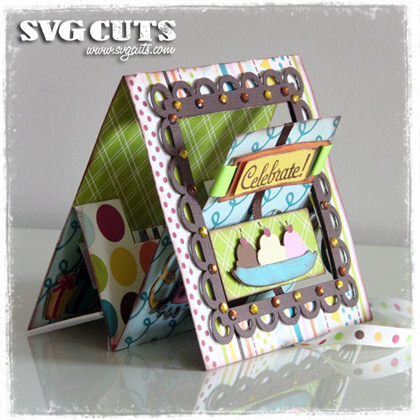
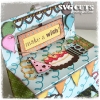
I've had the Breezy Backyard Lever Cards SVG Collection and Premium Pop-Up Cards SVG Collection for sometime now, and I've been wanting to do something with them! As usual, I wanted to do something different, and occurred to me that I could combine the sets to make a pop-up lever card! That's exactly what I did!
SVG Collections Used
![]() Breezy Backyard Lever Cards SVG Collection
Breezy Backyard Lever Cards SVG Collection
![]() Premium Pop-Up Cards SVG Collection
Premium Pop-Up Cards SVG Collection
![]() An Afternoon at Auntie Elaine's SVG Collection
An Afternoon at Auntie Elaine's SVG Collection
![]() A Day at the Carnival SVG Collection
A Day at the Carnival SVG Collection
![]() Birthday Elements SVG Collection
Birthday Elements SVG Collection
![]() Nested Lacey Shapes SVG Collection
Nested Lacey Shapes SVG Collection
![]() Buckles SVG Collection
Buckles SVG Collection
Dimensions
Here are the exact shapes, sizes and colors I used. Size to the dimensions shown below with “Keep Proportions” checked in the Shape Properties window.
| Breezy Backyard Lever Cards SVG Collection | ||
| outside.svg | 11" wide | multi-colored dot/stripe patterned paper |
| inside.svg | 11" wide | blue loop patterned paper |
| Premium Pop-Up Cards SVG Collection | ||
| happy birthday pop_up.svg | 9.6" wide (break apart, delete the card base and place inside lever card) | blue loop patterned paper |
| happy birthday pop_up.svg | 9.6" wide (break apart and delete the card base) | brown |
| An Afternoon at Auntie Elaine's SVG Collection | ||
| banana_split_top.svg | 3.1" wide (cut 2 - trim the top of one to create a dish) | brown |
| banana_split_middle.svg | 3.1" wide | pink |
| banana_split_middle.svg | 3.1" wide (break apart to just cut the cherries) | red |
| banana_split_bottom.svg | 3.1" wide | cream |
| A Day at the Carnival SVG Collection | ||
| pennants.svg | 5.5" wide (cut 3, use one as base, two for pennant colors) | brown, yellow, orange |
| balloon_top.svg | 0.7" and 0.85" wide (cut 4 each) | brown, pink, blue, green |
| marquee_top.svg | 3.4" wide | orange |
| marquee_bottom.svg | 3.4" wide (Cut 2) | blue |
| marquee_bottom.svg | 3.4" wide (blackout and cut 2) | checkered green, yellow |
| Birthday Elements SVG Collection | ||
| giftsbottom.svg | 3.5" wide | yellow, blue |
| giftstop.svg | 3.5" wide | red, brown |
| curly.svg | 1.15" and 1.3" wide | yellow, brown, red |
| gift2top.svg | 1" wide | blue |
| gift2bottom.svg | 1" wide | brown |
| gift3top.svg | 1.2 " wide | green |
| gift3bottom.svg | 1.2" wide | orange |
| hatbot.svg | 1.8" wide | brown |
| hattop.svg | 1.8" wide | pink, blue |
| cakemid.svg | 2" wide | red, brown |
| caketop.svg | 2" wide | yellow |
| cakebot.svg | 2" wide | cream |
| candle.svg | 0.1" wide | blue |
| Nested Lacey Shapes SVG Collection | ||
| square2.svg | 4.83" wide | brown |
| Buckles SVG Collection | ||
| label4_top.svg | 3.35" wide | yellow |
| label4_bottom.svg | 3.2" wide | orange |
| Free SVG file - Delicate Ribbon 04.26.10 | ||
| 3.5" wide | brown |
Design Tips
- Coordinate all your paper colors/style together before you begin. It's easier to achieve the look you want when you use various patterned papers from the same line (mine was A Walk in the Park from Echo Park).
- I inked all the edges with brown ink to give it a retro-look.
- For the cut files that I have marked as a blackout, use the blackout option in SCAL - this will be the bottom layer to the corresponding file.
- Take the "word" portion of the pop-up card (delete the card base) and place it over the inside fold-line of the Breezy Backyard Lever card. I cut just the "word" portion with another color, trimmed the top and bottom portions of it, and attached it over the pop-up portion on the card to make the work stand out.
- The ribbons used to tie the card together were adhered to inside of the two layers on both top and bottom, before the two card portions were attached together.
- To adhere the ribbon used to make the tag float - one end was adhered to the inside of the two card layers, then the ribbon was placed between the two tag files (marquee blackout), and the ribbon was attached to the top portion at the back. The ribbon was only attached to the card itself from half-way point to allow the card to fold out.
- Presents and hat were made from multiple cuts (with various colors) for one file, and I manually cut the parts apart and adhered together to add more colors.
- Use pop-dot adhesives to add another dimension to the pop-up card (I used pop-dots for the "celebrate" label, banana split, cake, hat, presents, balloons and pennants.
This may sound a little complicated, but it's real easy and gives it a fresh feel by adding a little twist to the two original amazing cards collection.
Have fun making them!
- Thienly



18 Responses to “Thienly’s Corner – “Celebrate” Pop-up Lever Card”